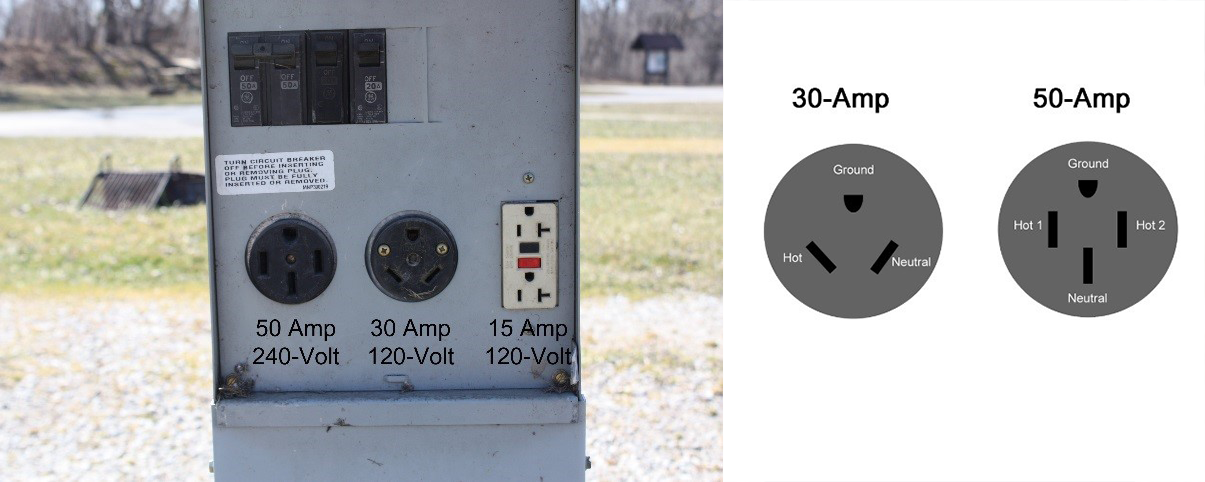
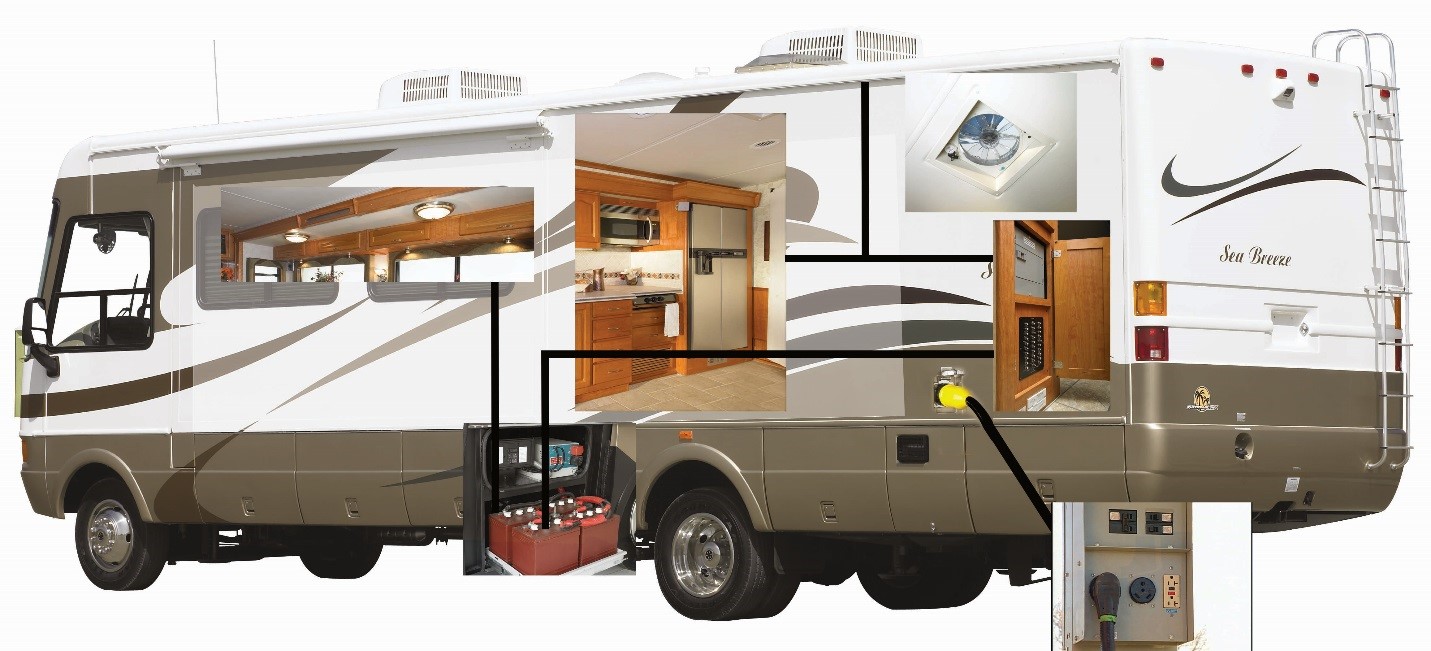
It is important to understand the basics of 120-volt power and how it supplies components in your RV. The power pedestal or “Shoreline Power” at the campground typically has three connections for 50 amp, 30 amp, and 15 amp power.
The 50 amp plug in is for larger coaches to supply 240 volts, 120 volts per “leg” to supply power for two roof air conditioners and other appliances.
The 30 amp plug provides 120-volt power limited to 30 amps so typically only one roof air conditioner can be use at a time. The 15 amp plug in is similar to a residential outlet and is only used for smaller trailers.
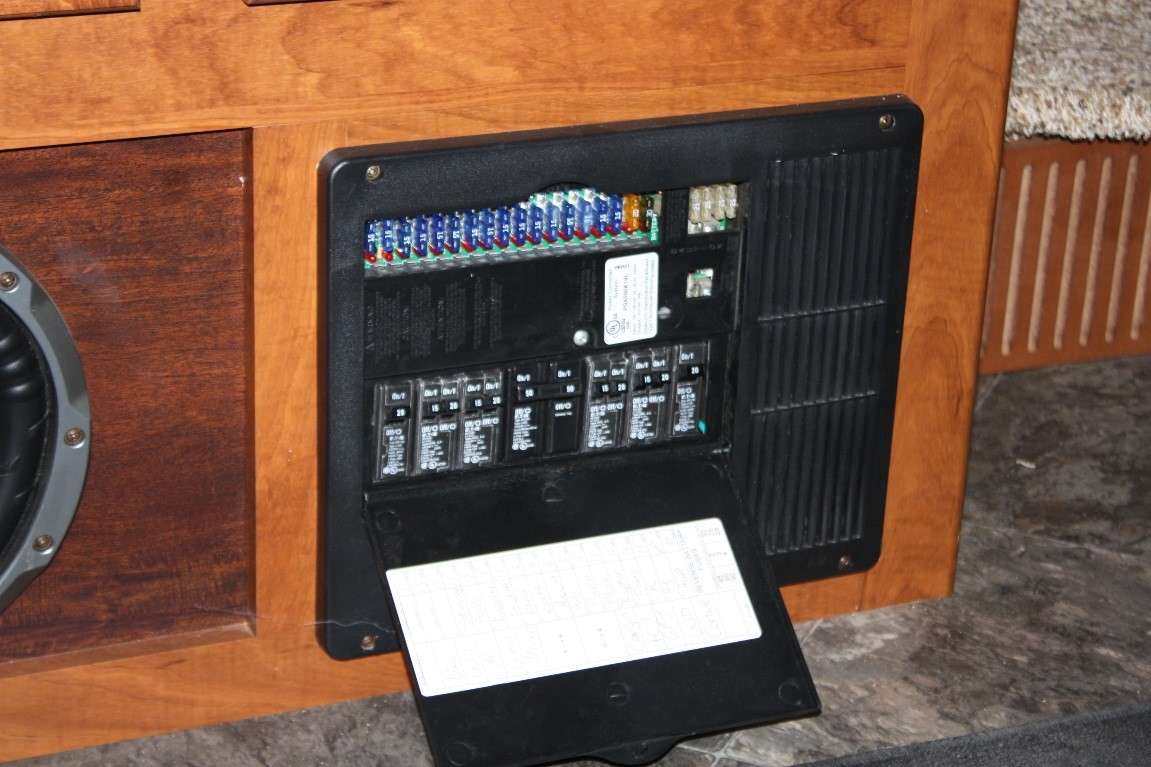
The 120-volt shoreline power comes into your rig to the distribution center which has a main breaker and then circuit breakers for 120-volt appliances, outlets, and the converter.
Each circuit breaker should be labeled with the component it powers and the amp capacity of the breaker. Power is supplied from the distribution center to the appliances and outlets by an electrical commonly referred to as Romex that has conductors or wires inside a protective sheeting known as the cable. For most appliances there would be three wires, hot, neutral, and ground very similar to the electrical connection in your home.
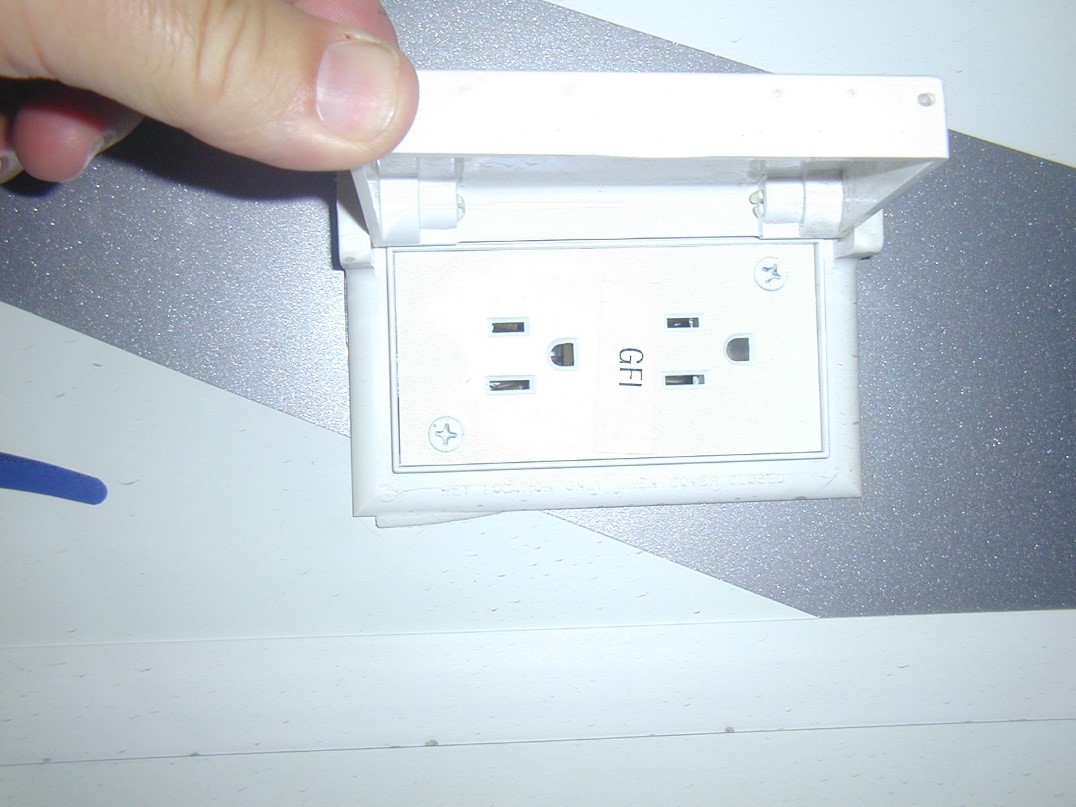
Any outlet located close to a water source such as the kitchen sink, bathroom sink and shower, or outside outlet must be protected by a ground fault circuit interrupter or GFCI. This outlet is a device that shuts off an electric power circuit when it detects that current is flowing in an unintended path such as through water or a person. It is used to reduce the risk of electric shock, which can cause the heart to stop or cause burns. They can also prevent some fires, like when a live wire touches a metal conduit.
Typically RV manufactures will use the recognized GFCI outlet with test/reset buttons in one location, then another Romex wire is connected to that same GFCI outlet on the second set of terminals and is routed to other outlets which is called “ganged” as there could be several outlets connected in this same fashion just like the outlets in your garage or living room of your home. If you have a GFCI outlet at the first connection, all other outlets on the circuit are protected by the GFCI but will usually not have the test/reset button and are known as “dummy plates”. They should have a GFCI Protected sticker on them, but that does not always stay on.
This means you could have one or two GFCI test/reset outlets on different circuits and if that outlets trips, or becomes defective, the other outlets on that “gang” or circuit will not get power. It’s a good idea to test which outlets are on what GFCI main outlet. Get a non-contact voltage tester from any home improvement store and press the test button on the GFCI outlet. Now use the non-contact voltage tester to verify what outlets do not have power. These will be connected or “ganged” to that outlet.
Back to the distribution panel, another 120-volt power supply goes to the converter or battery charger which also has it’s own circuit breakers. This provides a 12-volt charge to the deep cycle house batteries as they become depleted and will also have an amp draw that you will need to be aware of if you are on a 15 amp or 30 amp shoreline source. Newer models can draw up to 9 amps to provide more charging power but does limit the use of other appliances on the lower amp systems.
That is an overview of the 120-volt electrical system in your RV. It is similar to the set up in your home, with just a few differences, and the addition of a 12-volt converter thrown into the mix. Coming up next, we’ll learn to understand the power power requirements of your rig, and how to manage it!


The article first statement "The 50 amp plug in is for larger coaches to supply 240 volts" is very misleading if not just wrong. The 50 amp plug provides 2 ea 120 Volt circuits with 50 amp each. In order to get 240 Volts one would need to re-wire or misswire their typical 50 amp RV plug.
I have a wiring problem from my 120V Romex wire from the breaker to the bathroom Water heater switch. Trios breaker instantly. Disconnected Hot (black) from switch still trips. Switched breakers still trips. I have an access question. Wire seems to be running under floor but not outside of motor home. How can I gain access to the wiring?
Is it possible to just plug this unit into your house power?
I have this generator (Onan 7000) that is wired only for one leg right now. I have the 2 hot wires on the same block (I think L1) and 2 white wires with different striping. If I move one of the hot wires to block 2, do I also need to move one of the white ones with it? and does it matter which one? I want my generator to supply both A/C as it is capable off.
Why won't my 2 invertor generators (1-2000watt + 1-2500 watt) using a parallel connection box provide any AC power to my camper? I am utilizing a dogbone and I have 120 volts feeding the camper plug in but no voltage at the breaker panel.
Location of secondary GFI or circuit breaker... Replace the GFI outlet in the bathroom got a green light... But no 12 0 in some of the outlets
Looking for the fuse box for the RV? I found one under the drivers column but can fine the one for the electrical plugs and rest of the RV
On my 2005 Fleetwood Excursion my TV and the microwave has no power. I have searched throughout the kitchen and bathroom area for a reset button to no avail. Where is the reset button and I guess the next thing is to test the receptacles.
My rv won't convert 120 to 12v.
Need help setting up battery and propane